Perhaps the simplest way to edit a photo on iOS and iPadOS is to use a filter. The Photos app for iPhone and iPad offers nine filters — including vivid, dramatic, mono, silvertone, and more. You can apply them to your photos in just a few taps, and these can definitely help perk up any picture, so give it a try!
How to use filters in the Photos app for iPhone and iPad
Filters in the Photos app are handy when you want to salvage an image or a photo that didn't turn out the way you'd hoped, or you want to change the mood and go for a unique effect.
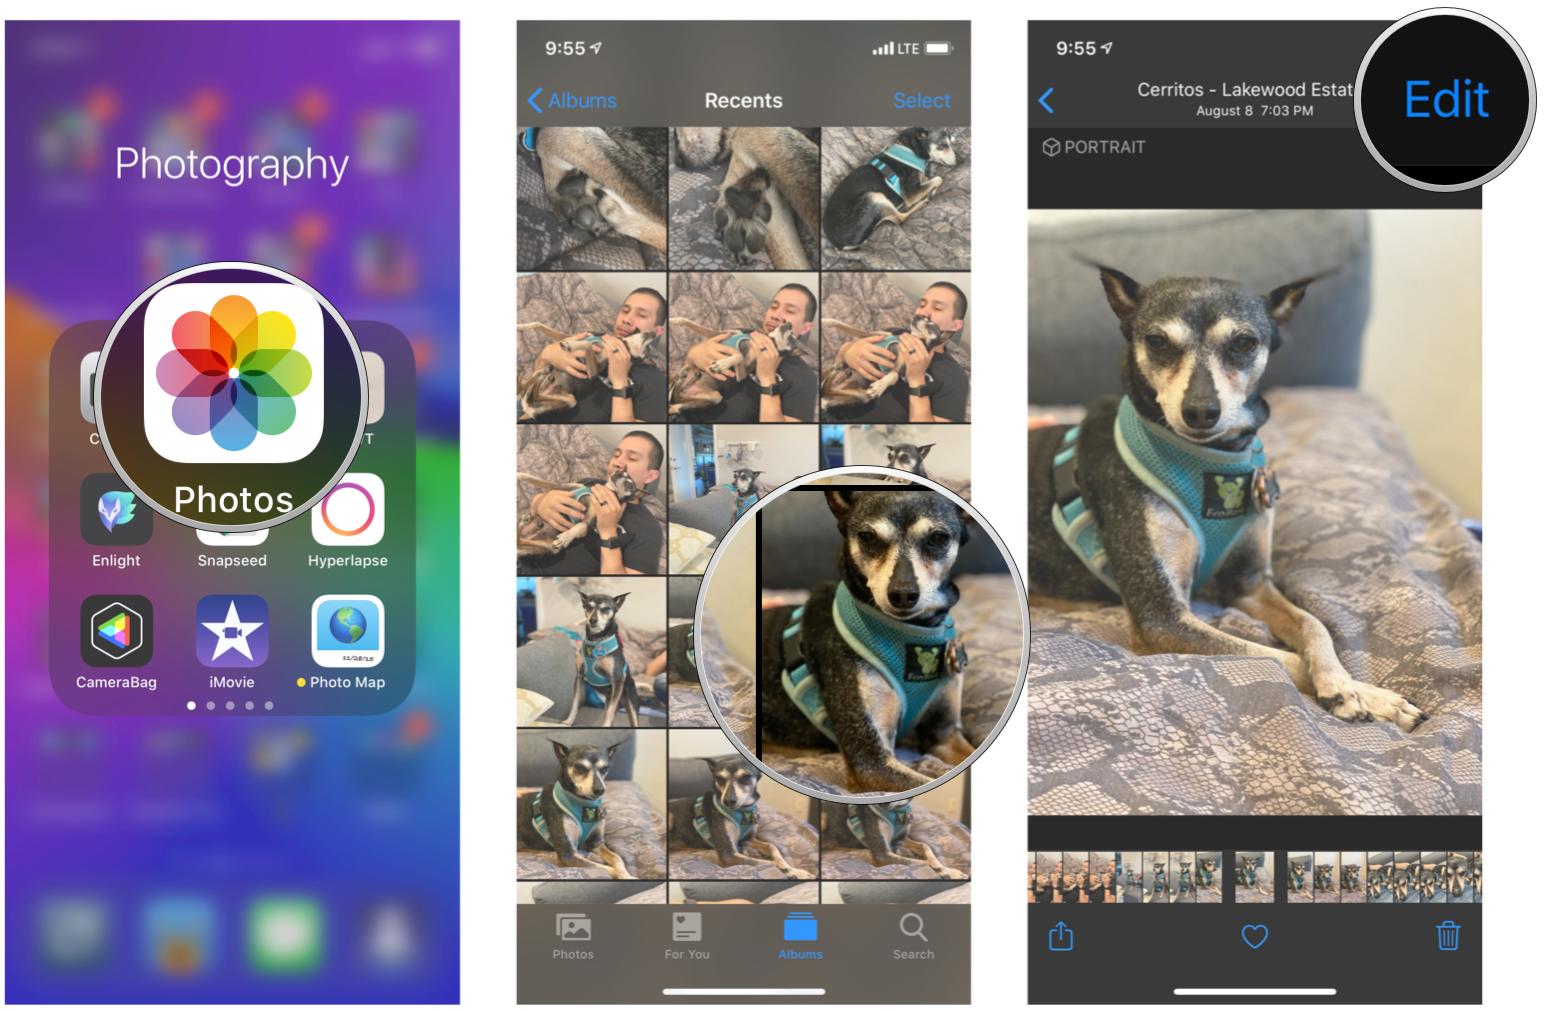
- Launch the Photos app from your Home screen.
- Tap on the photo you want to filter.
-
Tap the Edit button at the top right of the screen.

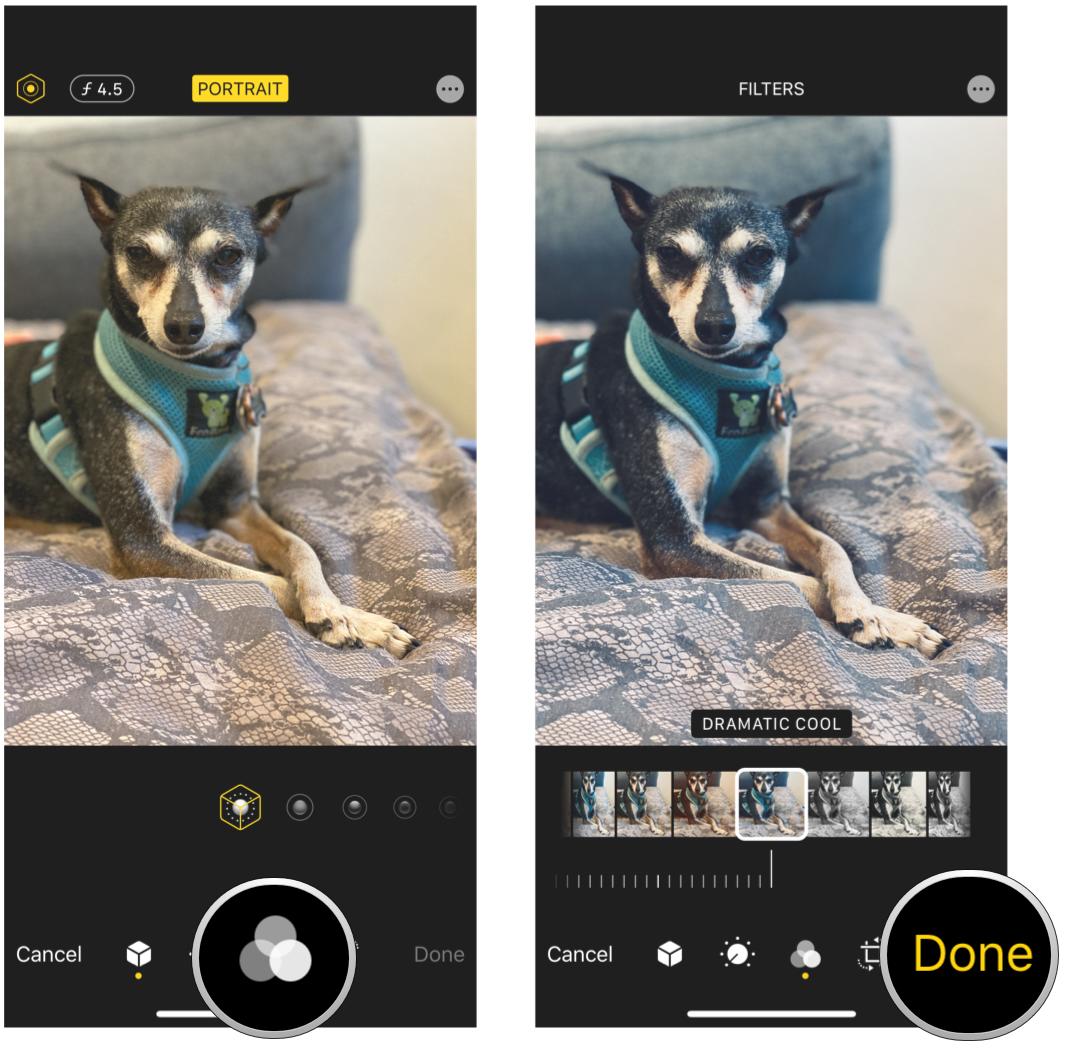
- Tap the Filters button in the bottom menu in the middle.
- Scroll, then tap on the filter you want to apply.
-
Tap Done.

When you're ready to push your iPhone photo-editing to fun, new level, you should consider a third-party app, which will offer more choices than the native Photos app. Among the more interesting ones available in the App Store are Prisma, Popsicolor, and Olli by Tinrocket. Or you could stick with a more traditional photo editing app too, as these always have their own set filters and effects to enhance photos. Experimentation is key!
How to apply live filters with the Camera app on iPhone and iPad

Did you know that in addition to applying the filters in the editing process, you can also take photos with the filter already applied? These are called "live" photo filters, and you can easily access them from the Camera app. Using live photo filters lets you see how the image will turn out with the filter before you even take the photo! It's great and convenient if you just want to take the pictures as-is, without having to edit them later.
Buy used, save big
jemjem makes it safe and easy to save money buying gently used technology for home and family.


