We all have VIPs; those very important people. And, Apple gives us a very special place to keep messages from them in the Mail app. This makes it easy to see emails from those people you designate as VIPs, all in one spot.
If you haven’t used this feature yet, or are new to iOS or macOS, here’s how to add and also remove people from your VIP mailbox.
Add or remove VIPs on iPhone or iPad
You have two different ways to add VIPs on your iOS device. First, with your Mail app open, open a message from a sender you want to add to your VIPs.
1) To the right of the sender’s name (or email), tap the arrow.
2) On the next screen, tap Add to VIP.
3) Tap Done.
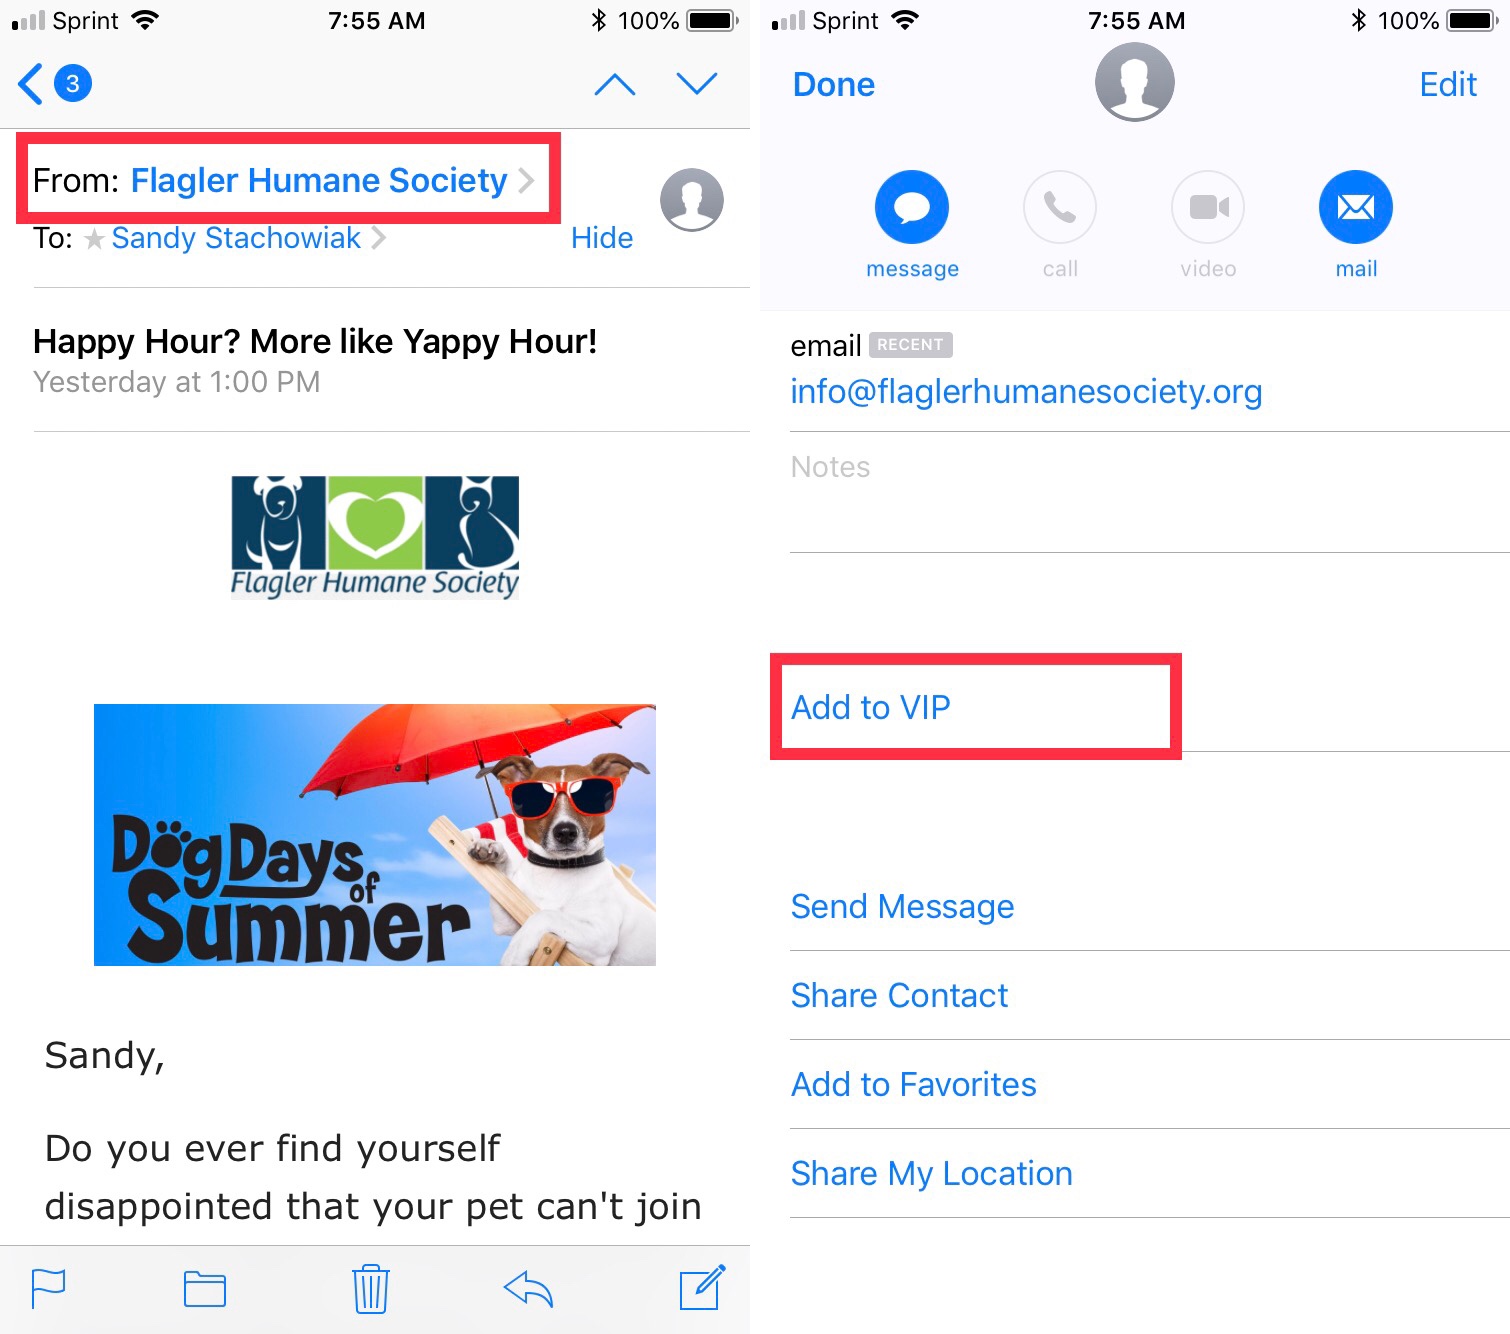
You are then taken back to the email and can see a star next to the sender indicating they are a VIP.
If you want to remove that sender as a VIP later:
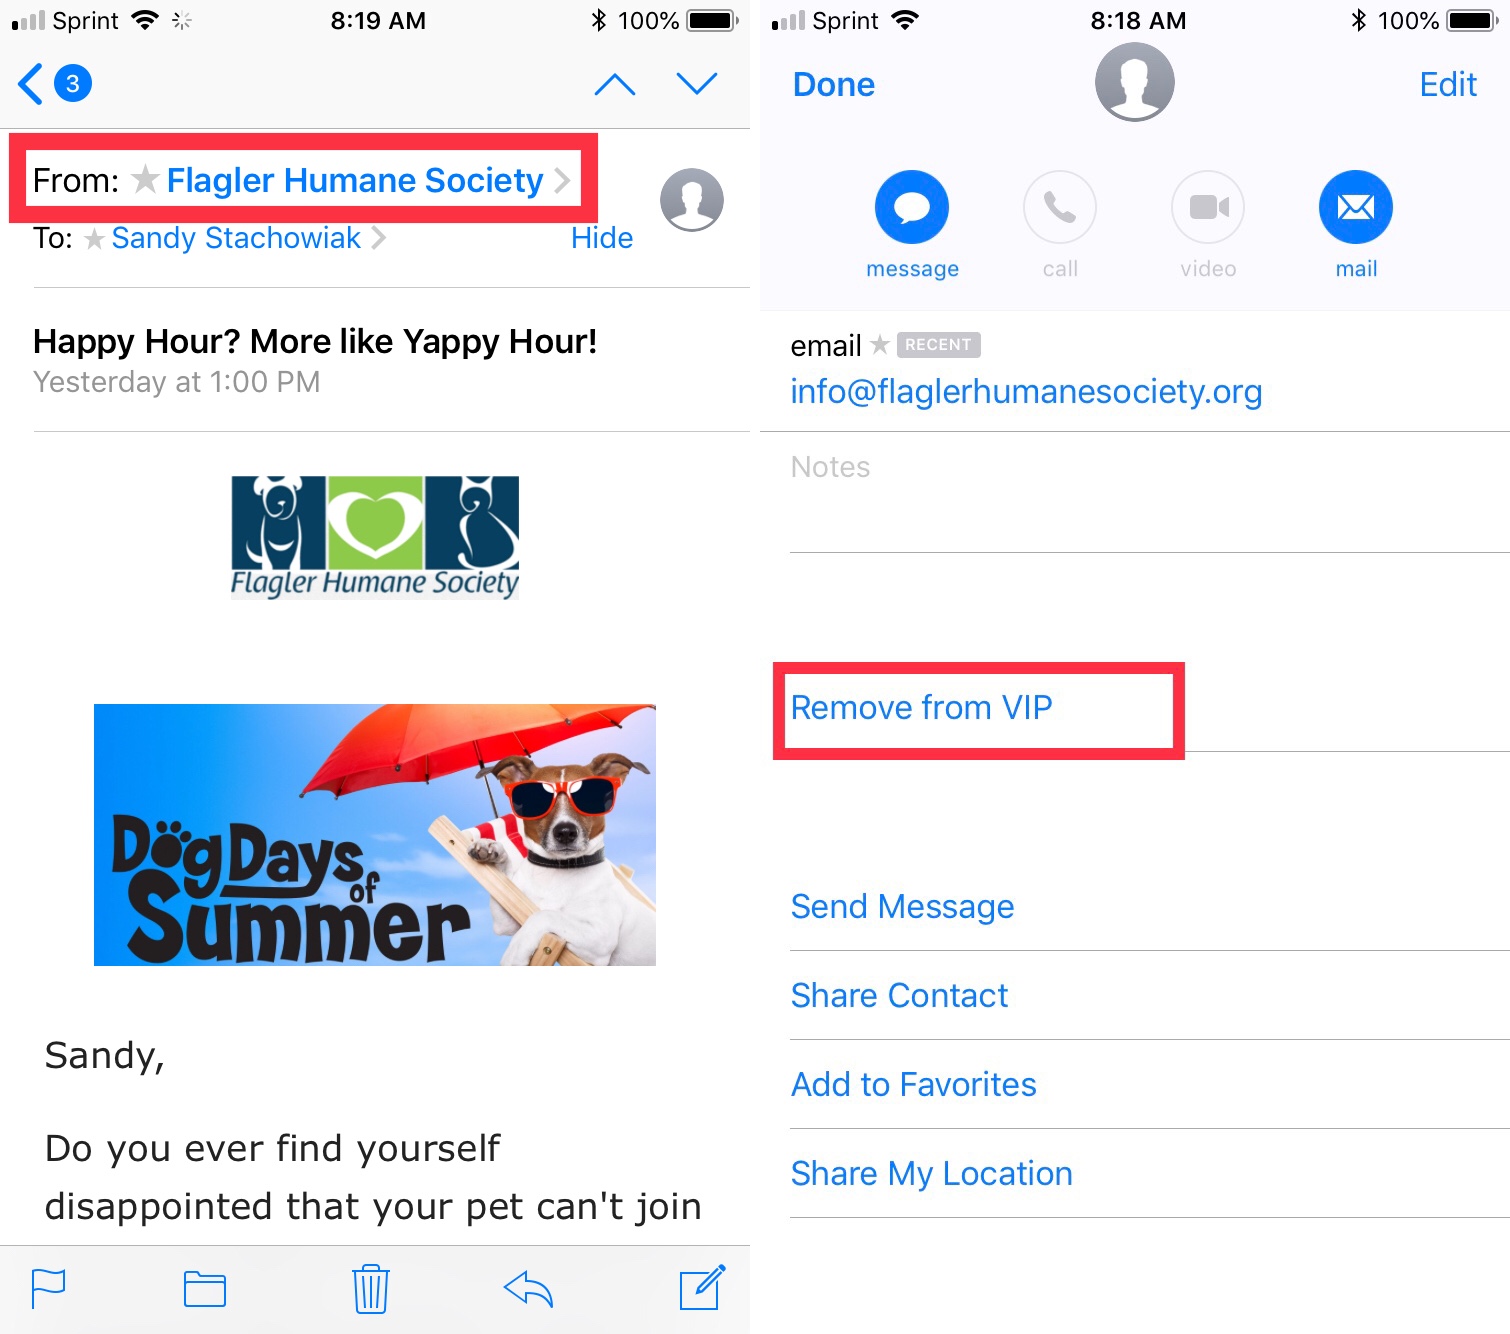
1) To the right of the sender’s name (or email), tap the arrow.
2) On the next screen, tap Remove from VIP.
3) Tap Done.
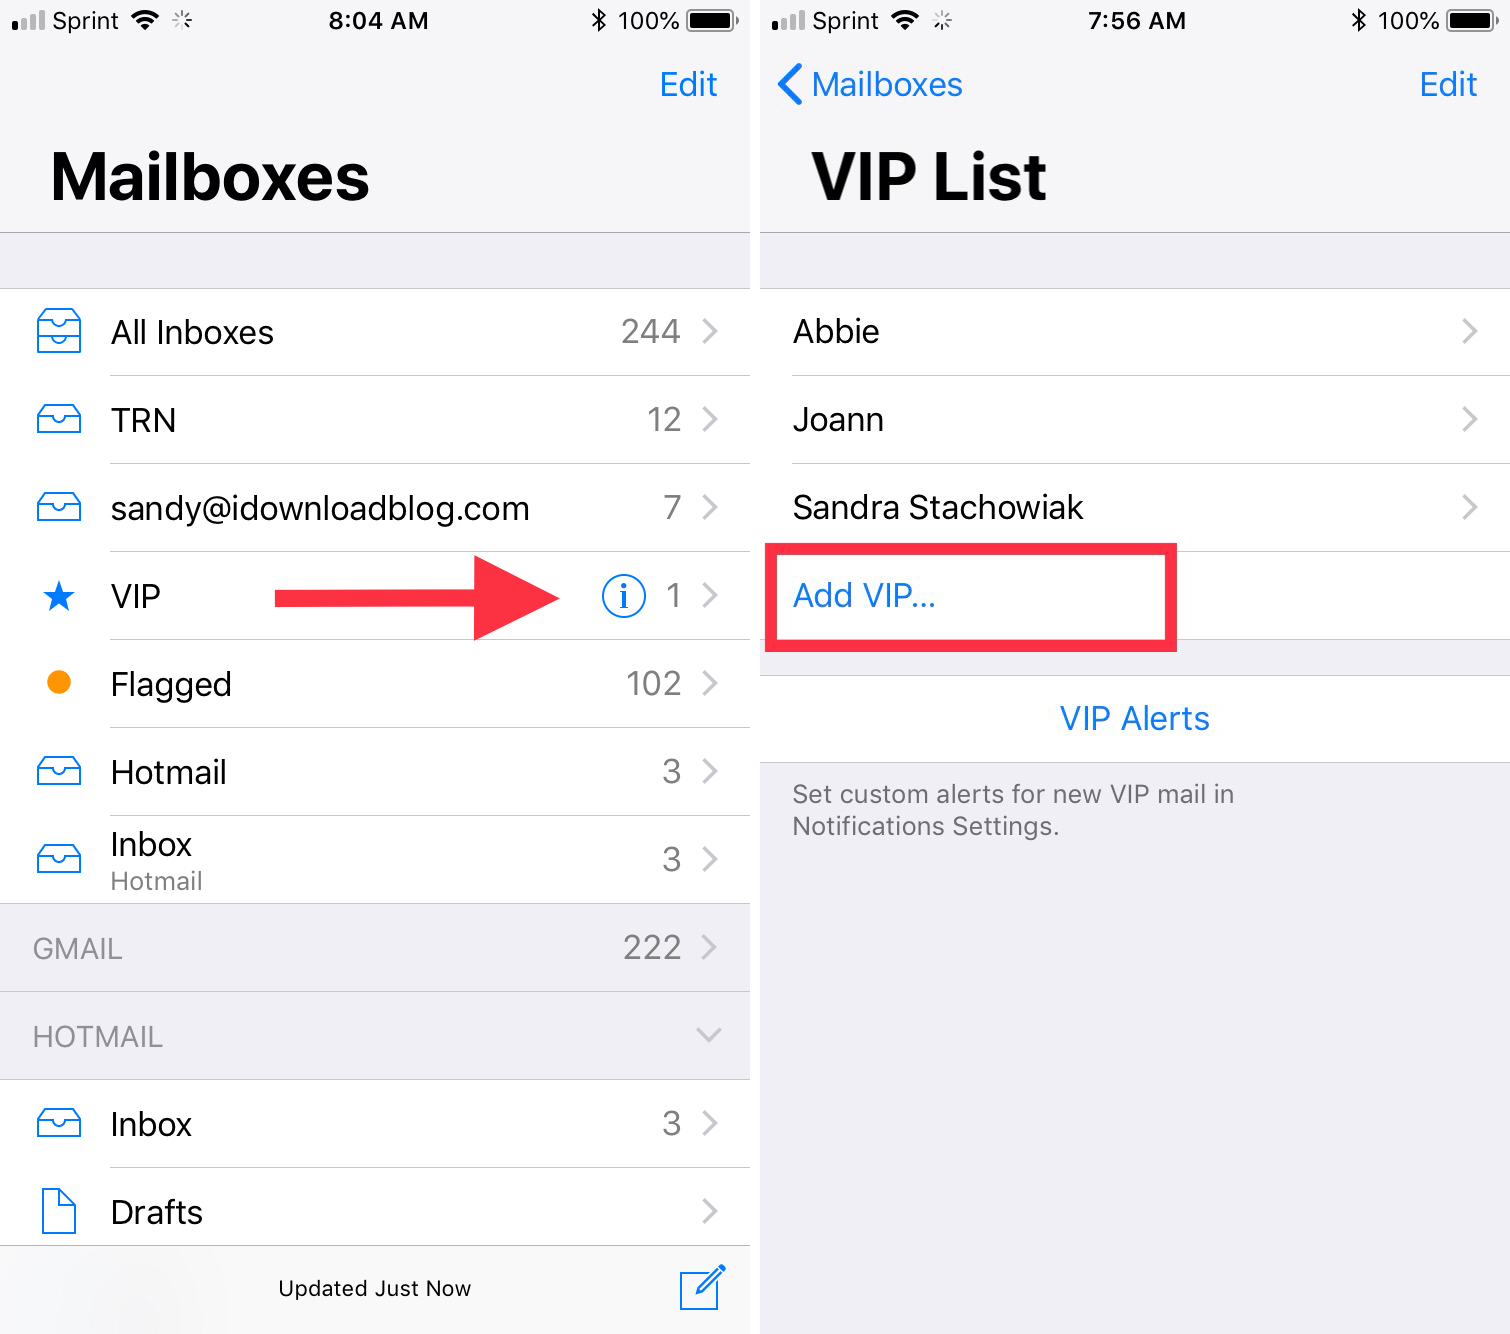
The second way to add a VIP is to open your Mail app to the Mailboxes screen.
1) Tap the blue information icon next to the VIP mailbox.
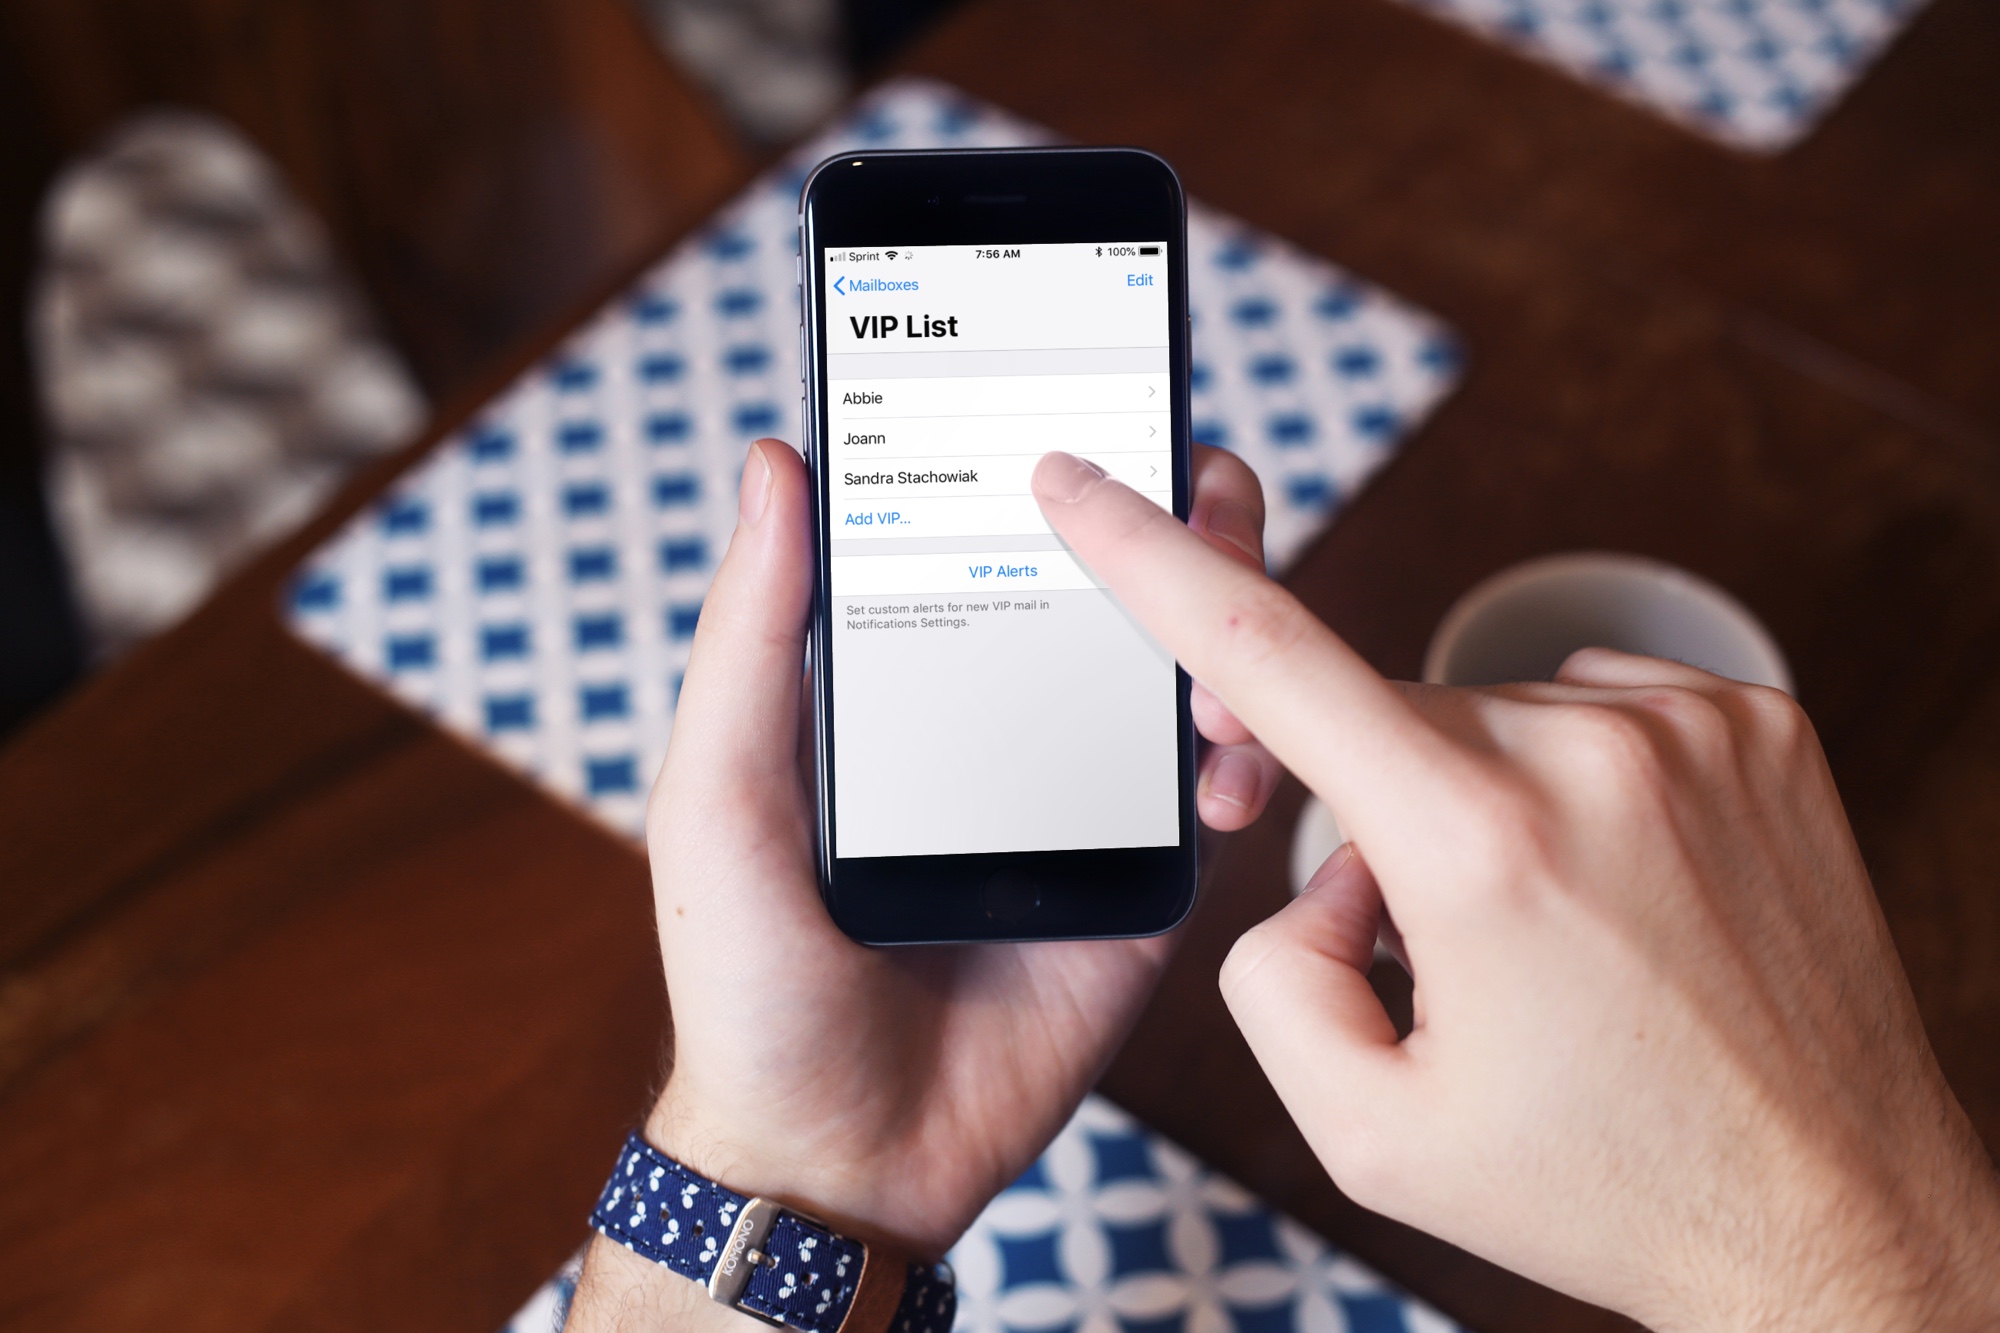
2) In your VIP list, tap Add VIP.
3) Select a contact and they will pop right into your VIP list.
If you want to remove that VIP, or more than one:
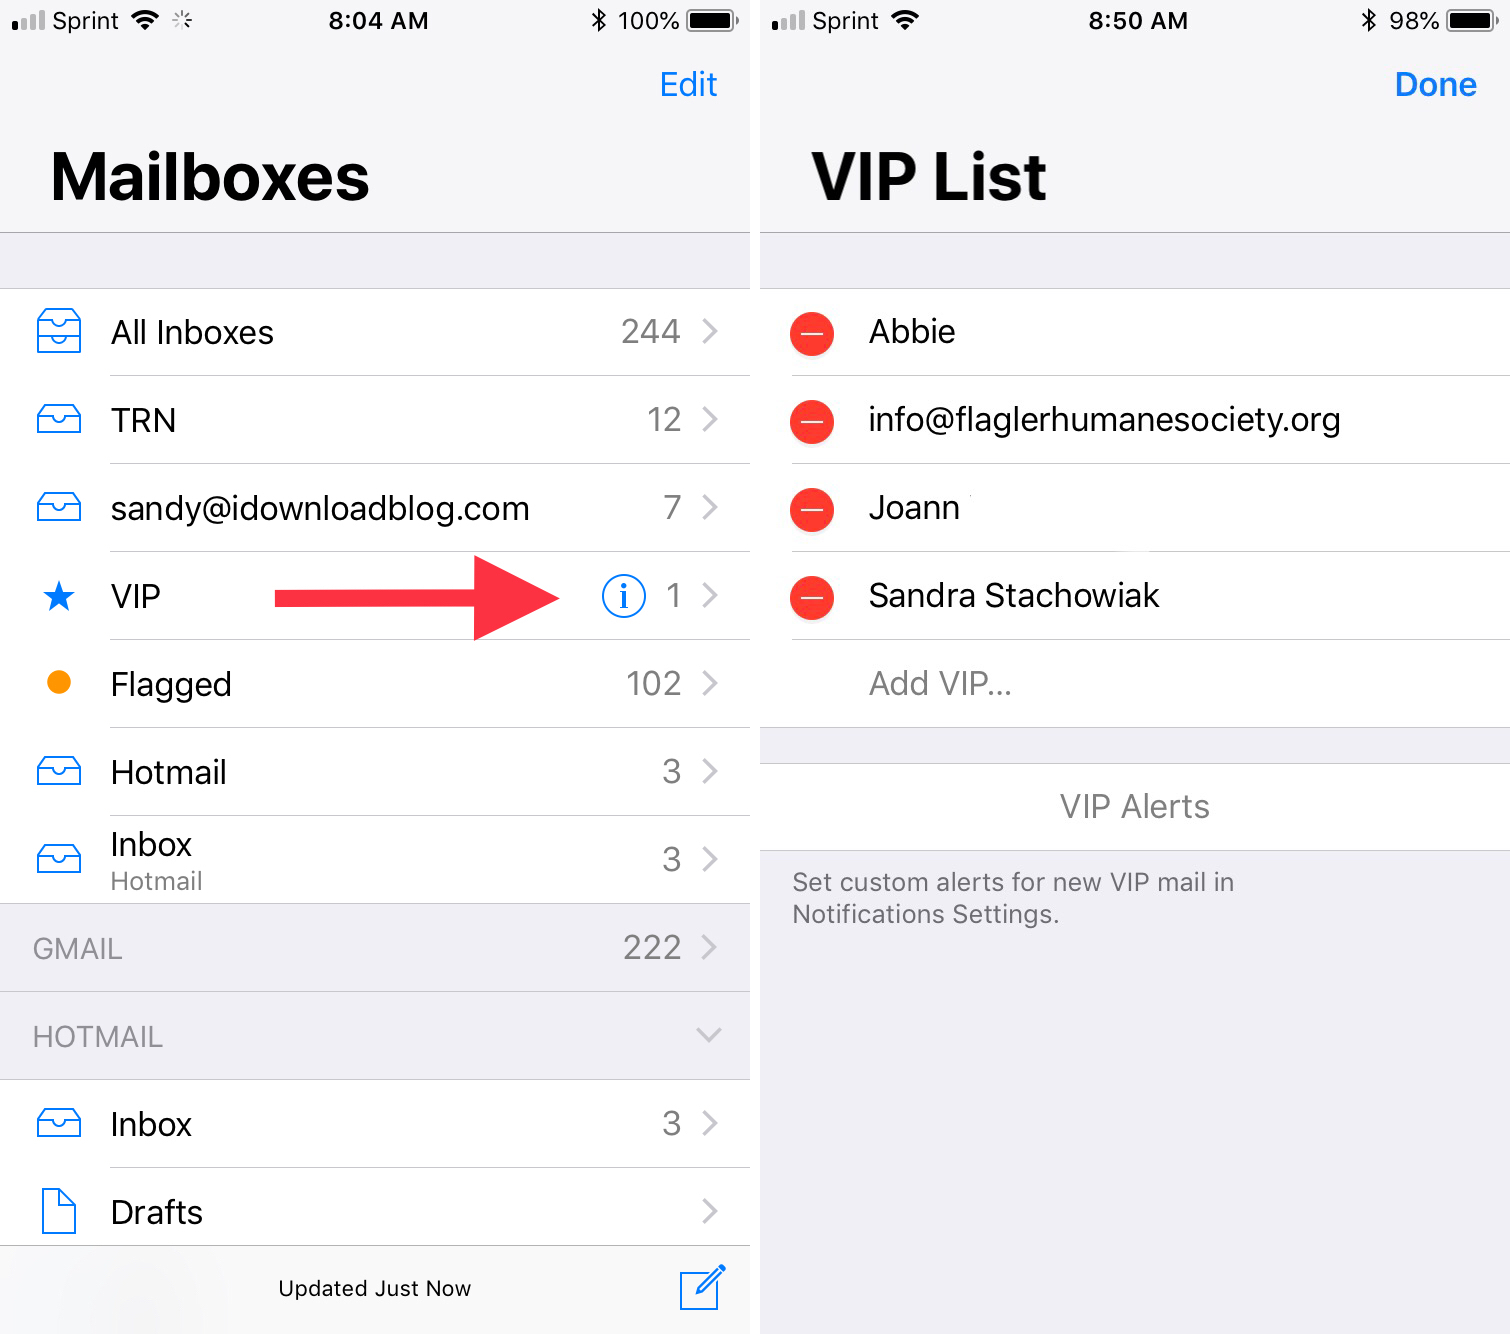
1) Tap the blue information icon next to VIP mailbox.
2) In your VIP list, tap Edit at the top.
3) Tap the red minus sign to remove the VIP.
4) Tap Done.
Add or remove VIPs on Mac
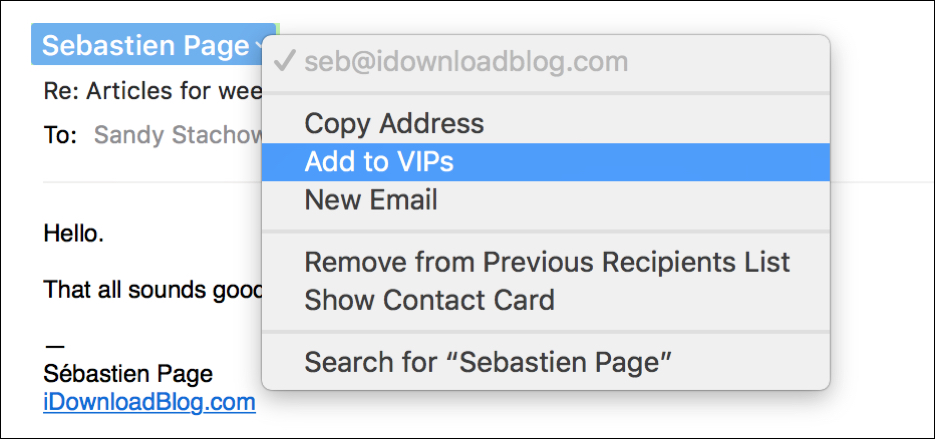
With your Mail app open, select or open a message from a sender you want to add to your VIPs.
1) To the right of the sender’s name (or email), tap the down arrow.
2) In the pop-up menu, click Add to VIPs.
If you want to remove that sender from your VIPs later:
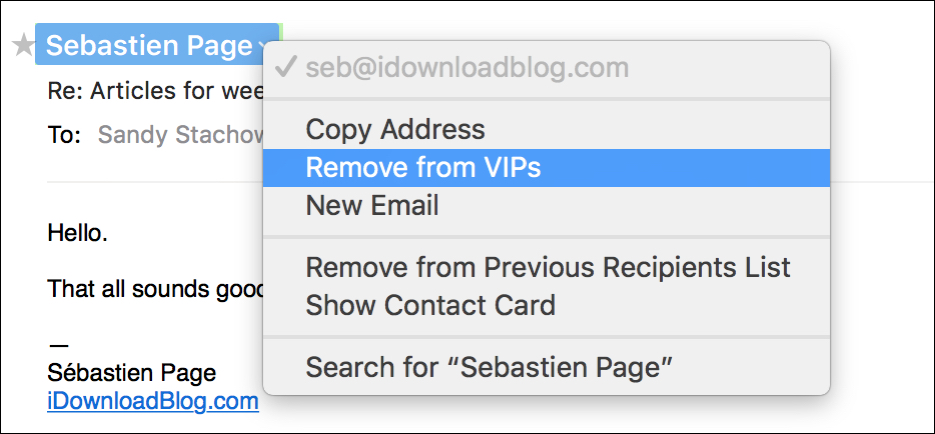
1) To the right of the sender’s name (or email), tap the down arrow.
2) In the pop-up menu, click Remove from VIPs.
OR
1) Hit Control and click the sender’s name in your Mail VIP mailbox.
2) In the pop-up menu, click Remove from VIPs.
