Apple Pencil is incredibly easy to use, but we've got a few tips to making the most out of your new iPad accessory.
Meet the Apple Pencil
If you've used a stylus on the iPad or other graphics tablets previously, you'll find some aspects of the Apple Pencil familiar — and others very different. Here's a crash course in all things Apple Pencil for you!
There are two different versions of the Apple Pencil: Apple Pencil (1st Generation) and Apple Pencil (2nd Generation). If you think their names are too similar, consider that they are both white and have nearly the same dimensions. It's important, however, to know the difference between both generations, because neither are supported on all iPad devices. The second-generation Apple pencil only works on certain iPad Pro models (and the first-generation Apple Pencil does not work on newer iPad Pro models).
Apple Pencil (1st Generation) works with:
- iPad Air (3rd generation)
- iPad mini (5th generation)
- iPad (6th generation)
- 10.2-inch iPad (7th generation)
- iPad Pro 12.9-inch (2nd generation)
- iPad Pro 12.9-inch (1st generation)
- iPad Pro 10.5-inch
- iPad Pro 9.7-inch
Apple Pencil (2nd Generation) works with:
- iPad Pro 12.9-inch (3rd generation)
- iPad Pro 12.9-inch (4th generation)
- iPad Pro 11-inch (1st generation)
- iPad Pro 11-inch (2nd generation)

How to pair your Apple Pencil with your iPad
Before you can start using your Apple Pencil, you'll need to pair it to your iPad or iPad Pro. The first and second generation iPad Pro pair differently, so be sure you know your generation before getting started.
How to pair the first-generation Apple Pencil
- Make sure the iPad you want to use is on and unlocked, then uncap your Pencil.
- Plug in your Pencil to the new iPad.
- When the Bluetooth Pairing Request appears, tap Pair.
How to pair the second-generation Apple Pencil to iPad Pro
- Make sure the iPad you want to use is on and unlocked.
- Place the Apple Pencil on the wide side of the iPad Pro with the magnetic strip.
- Tap Pair when the Bluetooth Pairing Request appears.

You can now use your Apple Pencil with your iPad or iPad Pro! If you want to move your Pencil to a different iPad, follow the same steps above with the new one.
How to check the battery level on Apple Pencil
The Apple Pencil doesn't have a physical charge indicator or LED light on its cylindrical body; instead, you can check its current battery life on your currently-paired iPad or iPad Pro.
How to check the battery level of the first-generation Apple Pencil
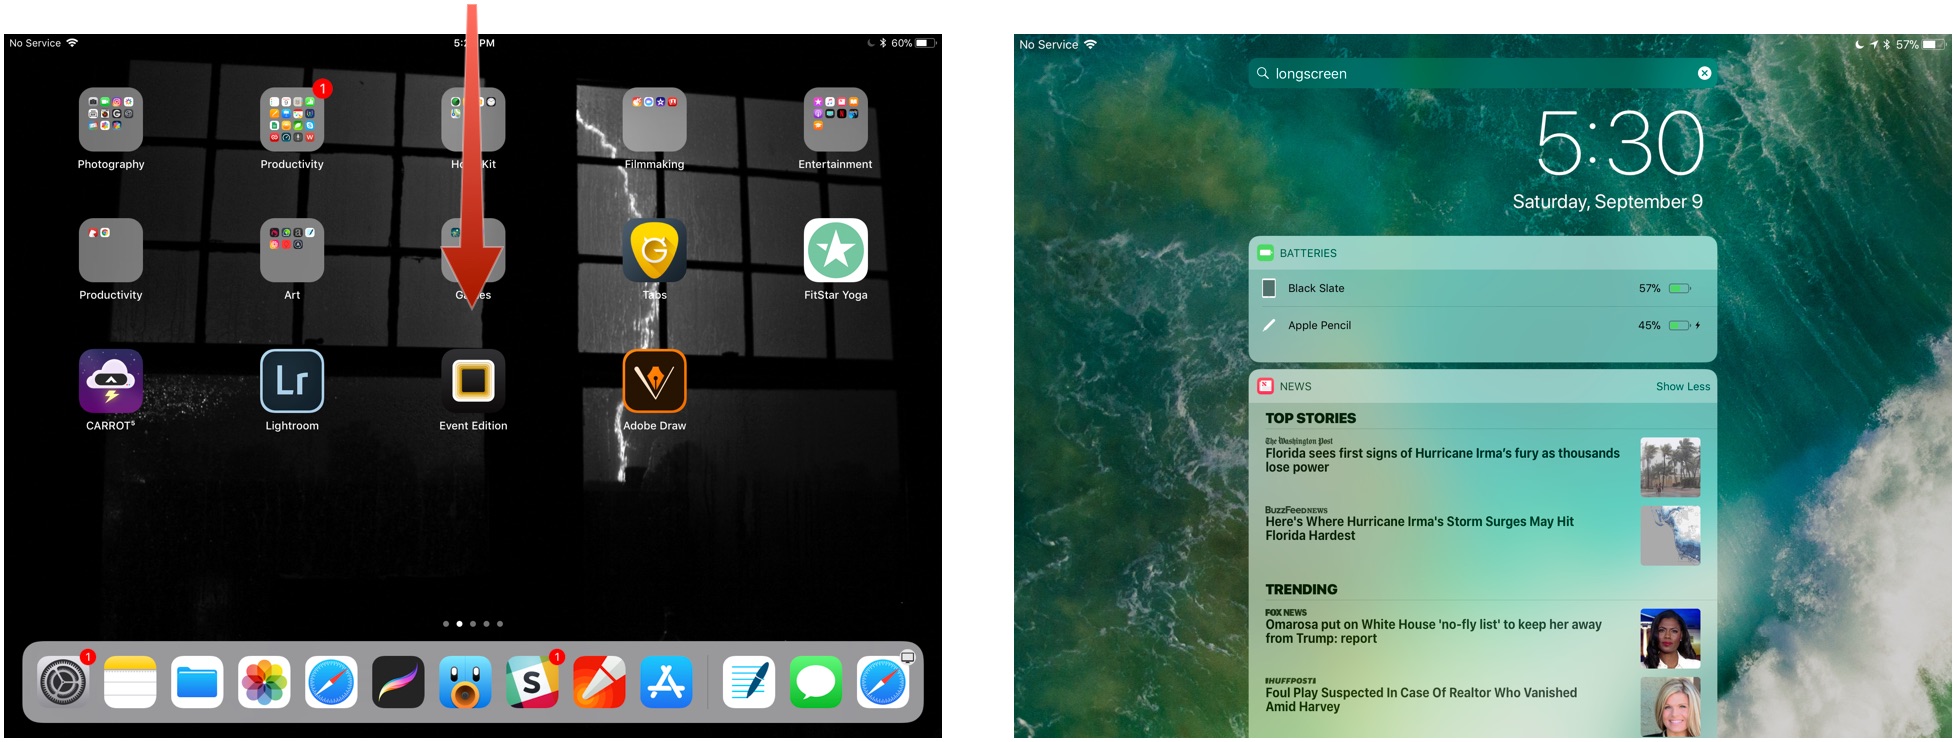
- Swipe down from the iPad's top bezel to invoke Notification Center (or turn the iPad on to view the Lock screen).
- Swipe right to see the Widgets screen.
-
View the Batteries section.
-
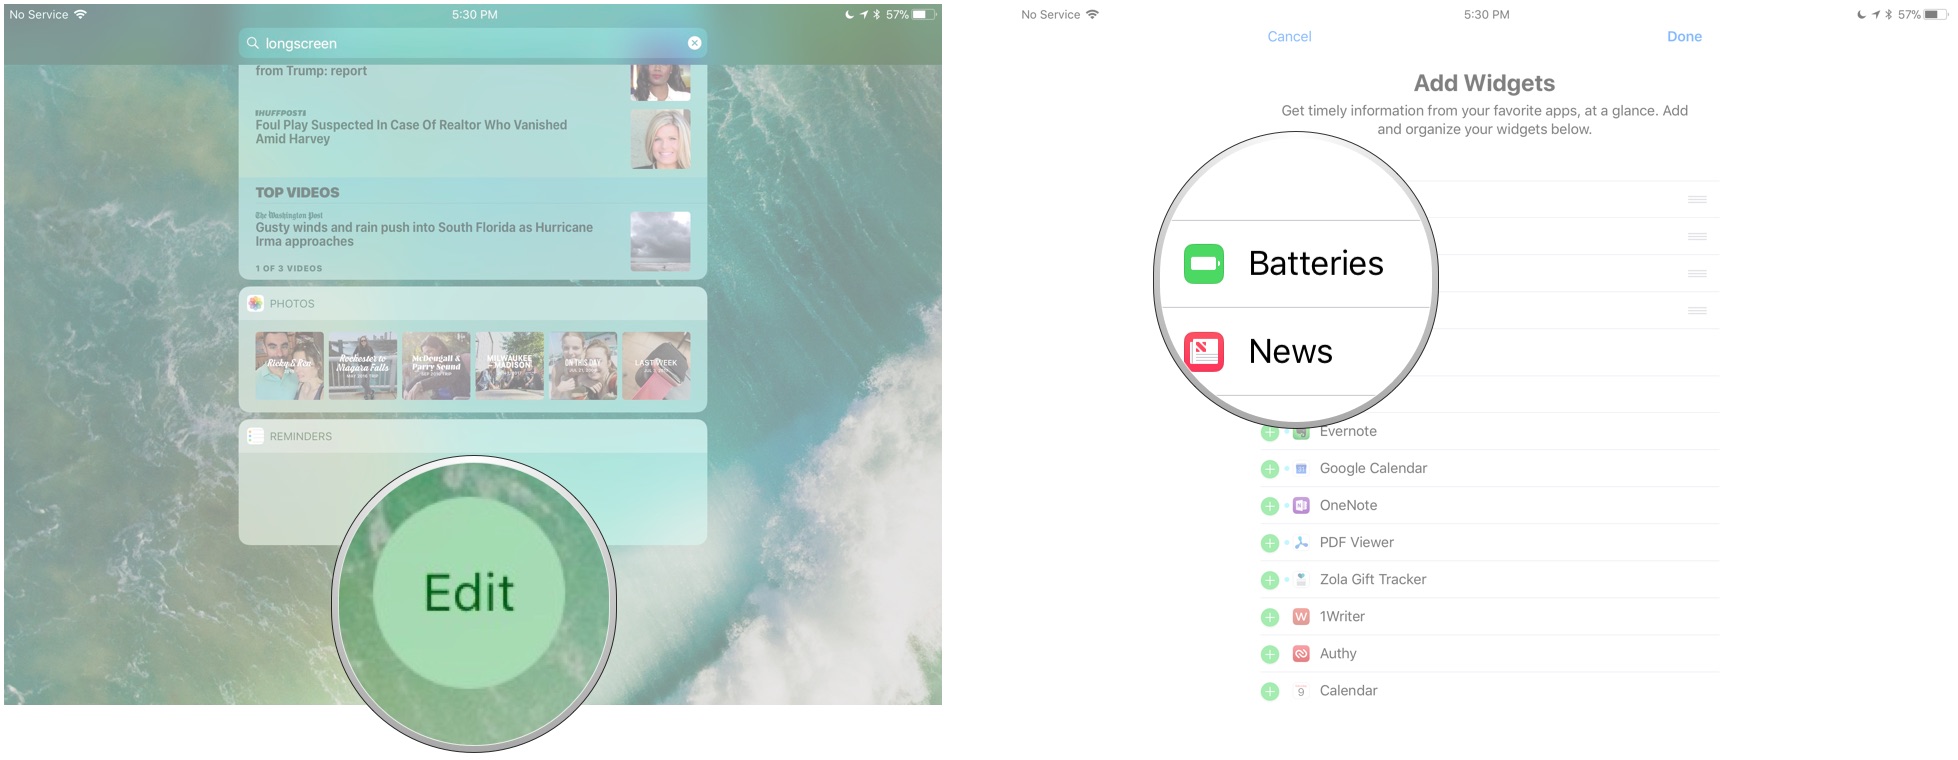
If you don't see the Batteries section, you may first need to tap Edit at the bottom of the Widgets area and tap the green Plus button next to Batteries to add it as an active widget.
How to check the battery level of the second-generation Apple Pencil
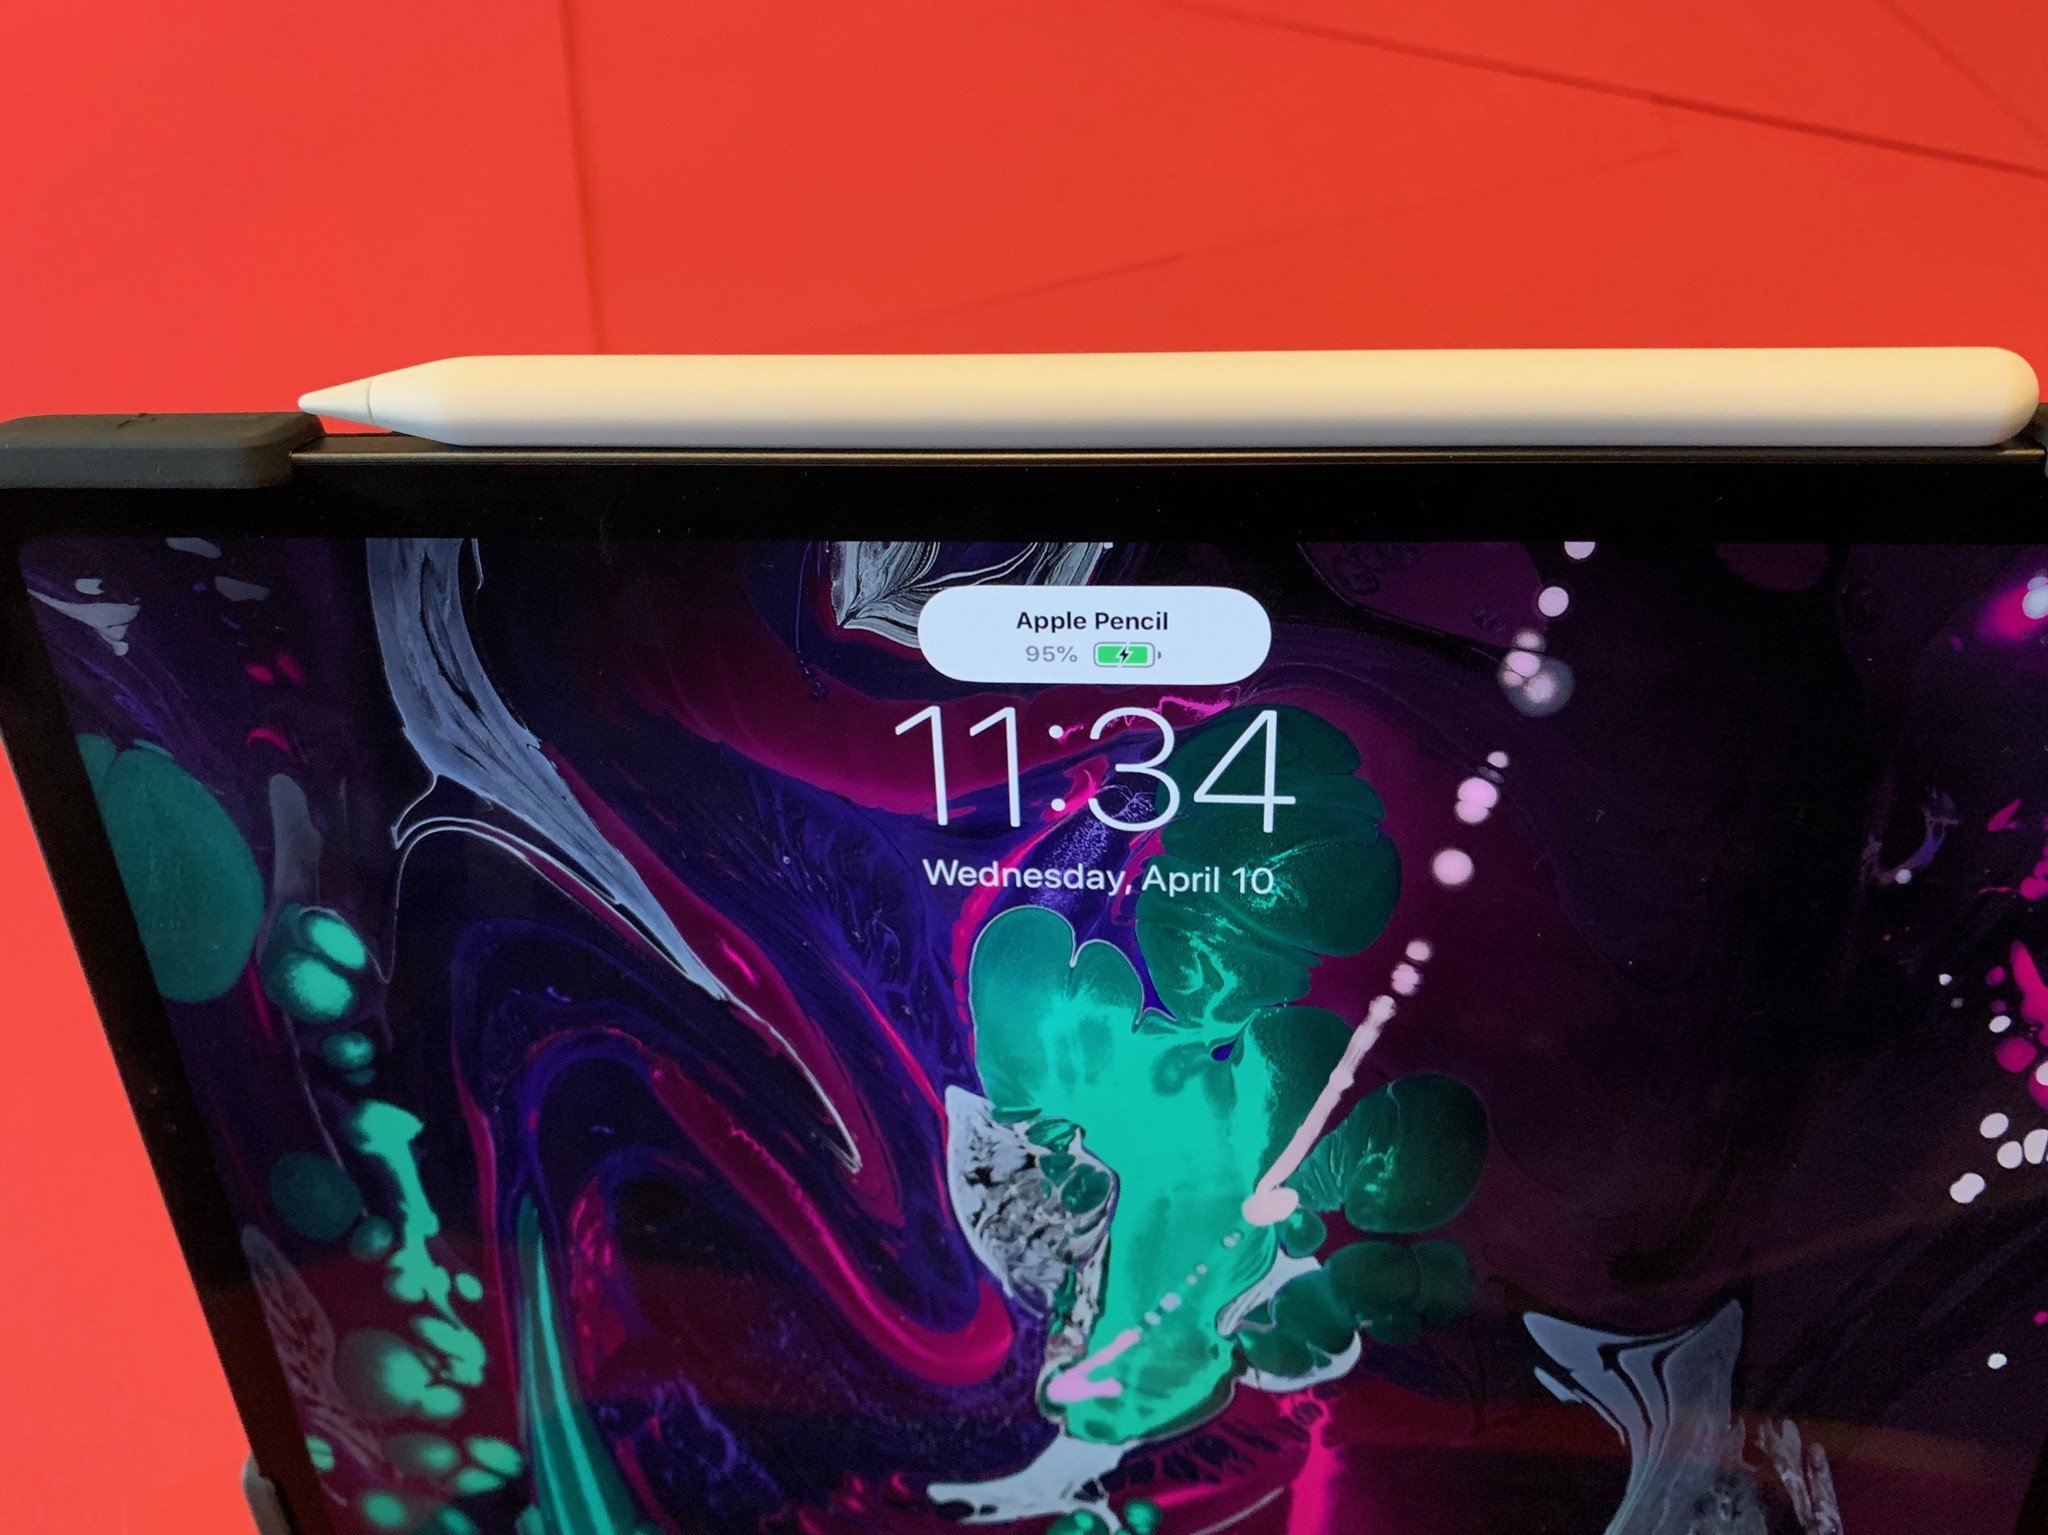
The second-generation Apple Pencil is even easier to check. You can follow the steps above for the first-generation Apple Pencil, or you can simply place it on the magnetic charging strip on the iPad Pro (or remove and then place it back down again if it's currently connected to the magnetic charging strip). A notification will pop up, telling you your current battery percentage.
How to charge Apple Pencil
When your Apple Pencil hits 20%, 10%, and 5% respectively, it will give you a charge warning. (You can also check your current battery status at any time by bringing up Notification Center.)
The first and second-generation Apple Pencil charge differently, so make sure you know your generation before reading on.
How to charge the first-generation Apple Pencil using your iPad Pro
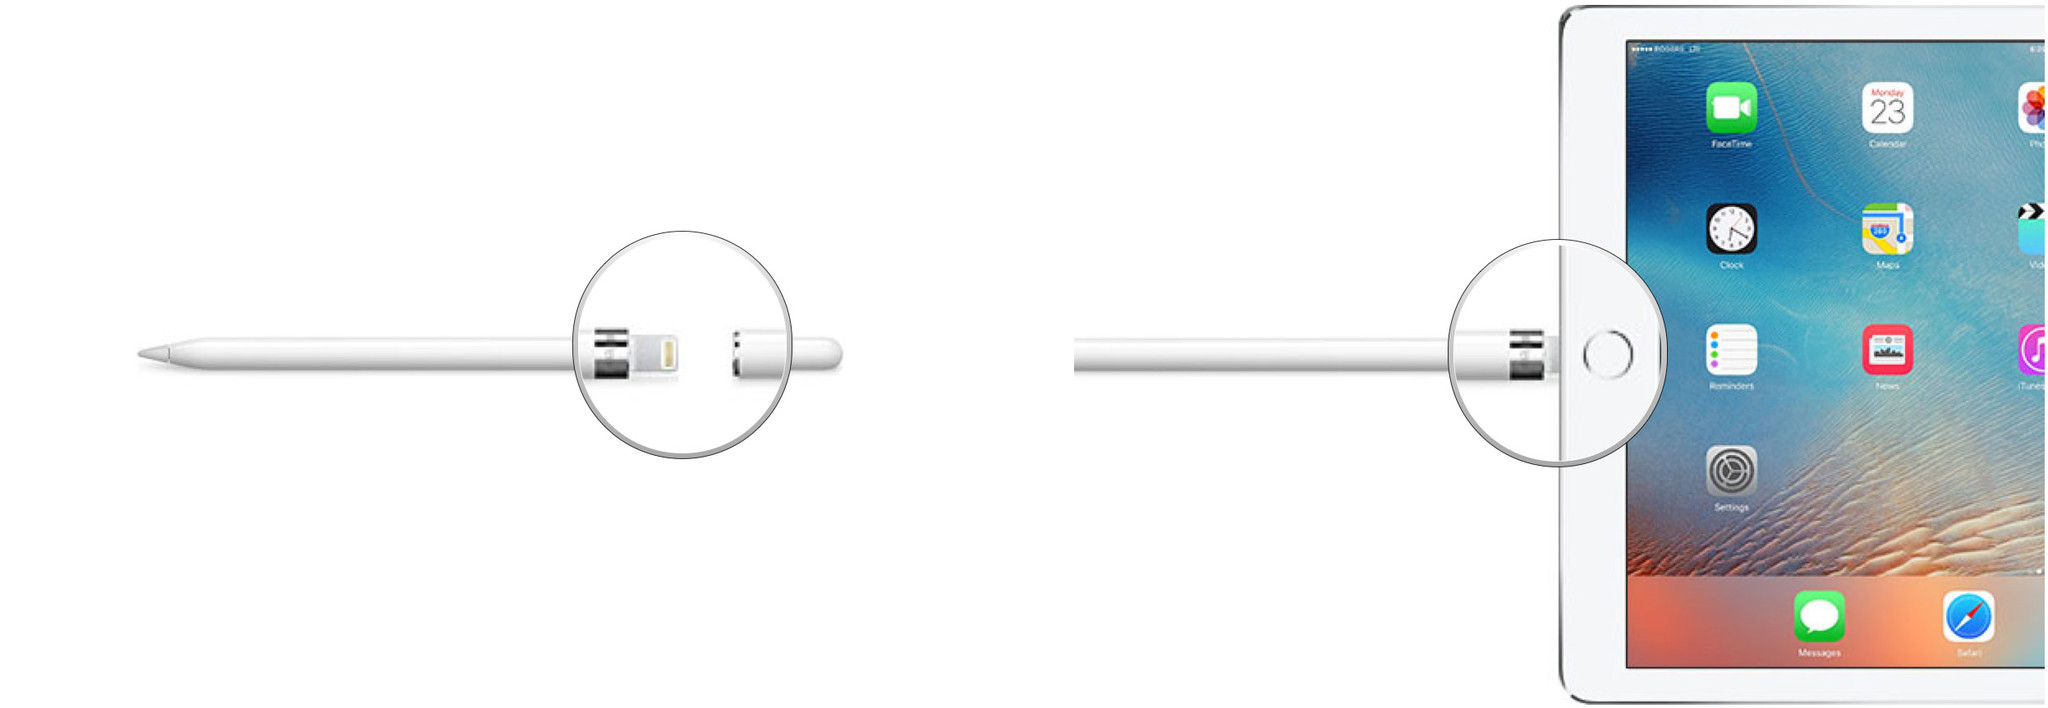
- Remove the cap from your Apple Pencil. (If you're worried about losing the cap during the charging process, you can magnetically attach it to the iPad next to the Home button.)
-
Insert your Apple Pencil's Lightning connector into your iPad or iPad Pro's Lightning port.
How to charge the first-generation Apple Pencil using the Lightning adapter
- Remove the cap from the back of your Apple Pencil.
- Insert your Apple Pencil's Lightning connector into the Lightning adapter.
-
Plug the Lightning adapter into your Lightning cable.

How to charge the second-generation Apple Pencil
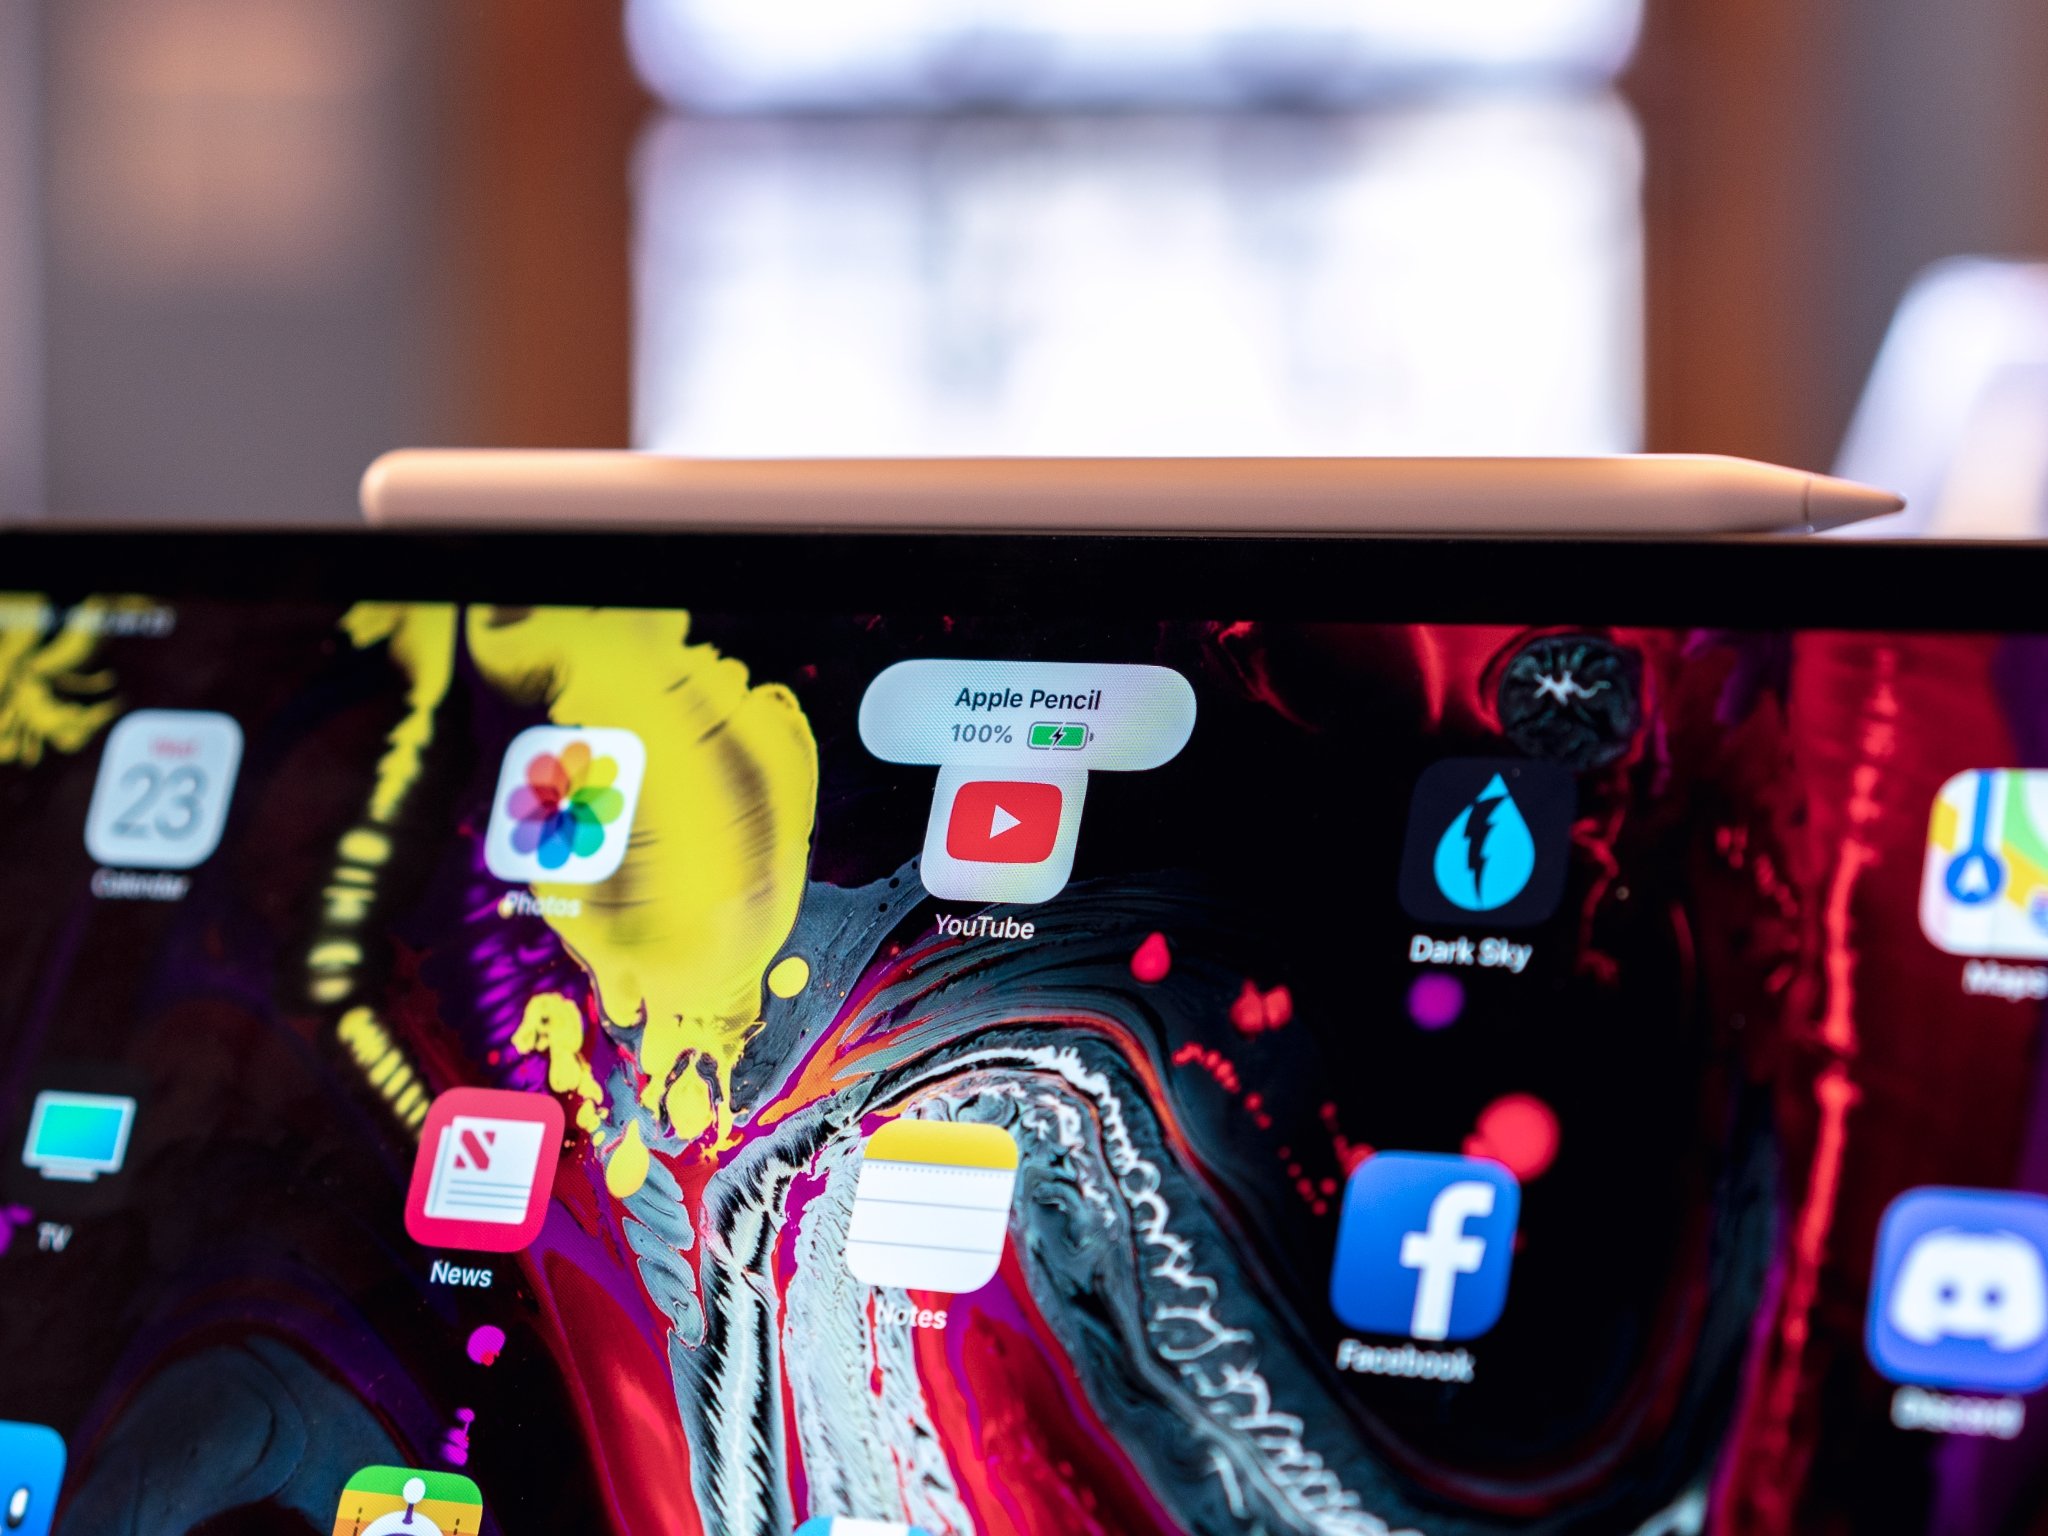
For the second-generation Apple Pencil, Apple made it much easier to charge. There's only one way.
Just Place the Apple Pencil on the wide side of the iPad Pro with the magnetic strip.
The Apple Pencil's quick-charge technology provides users up to 30 minutes of use after a 15-second charge, but we generally recommend charging your Pencil for at least 5-10 minutes — especially if it's under 20% — to avoid having to constantly recharge.
How to un-pair your Apple Pencil from your iPad
Your Apple Pencil will automatically un-pair from your iPad or iPad Pro if you pair it with a different iPad or you pair a different Apple Pencil with your iPad. You can also manually un-pair if the need arises.
- Launch the Settings app from your iPad's Home screen.
- Tap Bluetooth.
- Tap the Info button to the right of Apple Pencil under My Devices.
-
Tap on Forget.

To re-pair the first-generation Apple Pencil, simply plug it back into the Lightning port on your iPad or iPad Pro.
To re-pair the second-generation Apple Pencil, simply place it on the magnetic charging strip of your iPad Pro (2018) again.
Buy used, save big
jemjem makes it safe and easy to save money buying gently used technology for home and family.


