iMessage on Android. It's a beautiful pipe dream that's fun to think about, but in reality, it likely won't ever be a thing. Or will it? If you have a bit of patience and technical knowhow, there is a way to get iMessage on your Android phone right now using something called AirMessage. It's not the easiest thing to set up, but once you have everything up and running, the experience is pretty solid.
How to download the AirMessage macOS client
Before we dive into the step-by-step guide, there is one big caveat to this whole process. To get iMessage working on your Android phone, you'll need a Mac of some kind. It can be an iMac, Mac Mini, or MacBook — the only thing is that the Mac needs to be on 24/7 as it acts as a server for your iMessages to be relayed to your Android phone.
With that out of the way, here's how the process works.
- Go to www.airmessage.org on your Mac.
- Click Install at the top of the page.
- Click AirMessage server for macOS.
-
Click the .zip file once it's down downloading.

- After the Downloads folder pops up, click AirMessage.
- Click Open to confirm that you want to open the app.
-
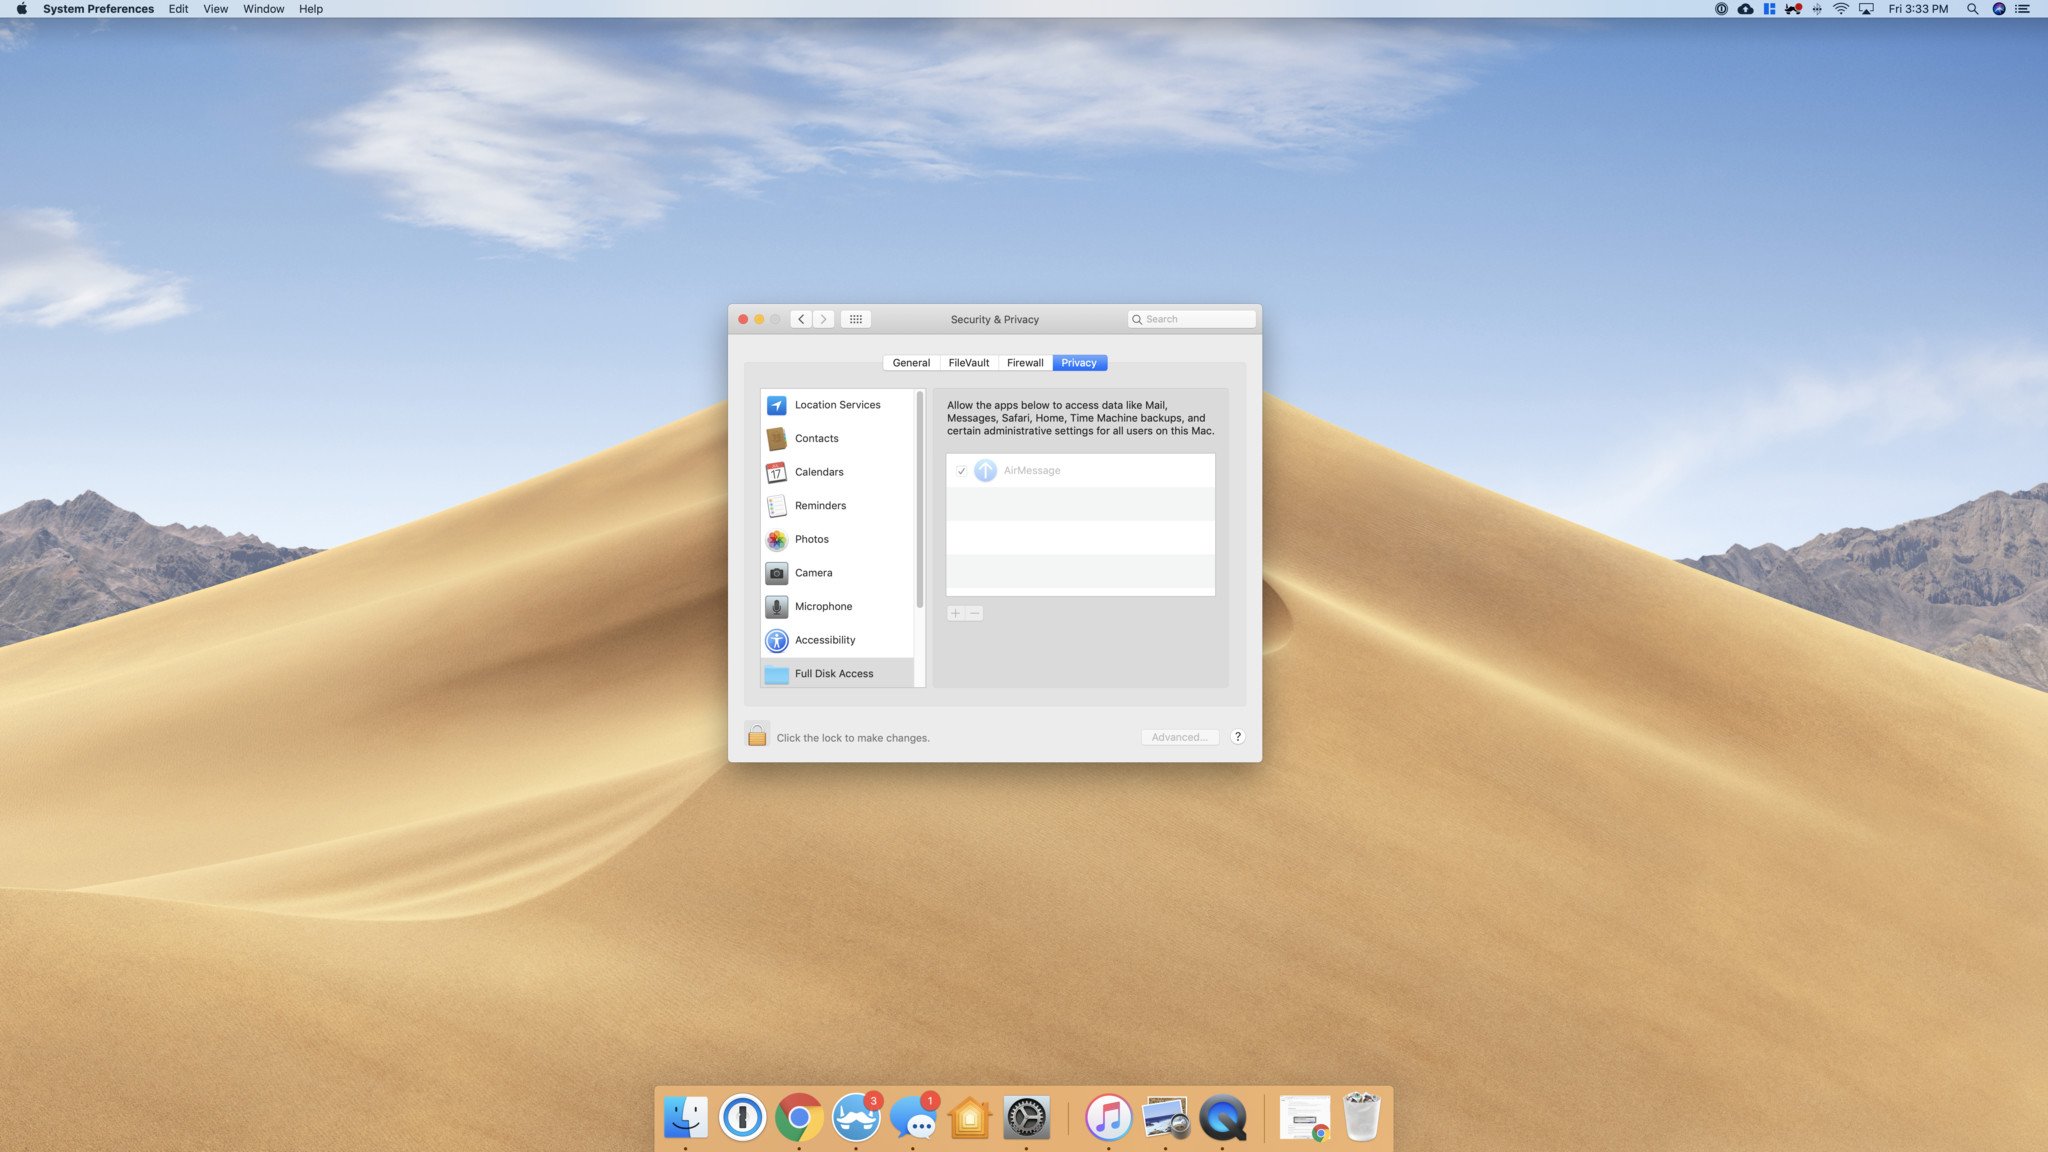
Click Open System Preferences.

- Click the lock icon near the bottom left.
- Type in your password and click Unlock.
- Click the checkbox next to AirMessage.
-
Click Quit Now.

-
Click the lock icon again to prevent further changes.


How to change your macOS sleep settings
Now that AirMessage is downloaded, you'll want to adjust your macOS sleep settings so that it never goes to sleep. AirMessage recommends you do the following:
- Click System Preferences.
- Click Energy Saver.
-
Drag the Turn display off after slider to Never.


From my understanding, however, you can actually have the display turn off without breaking AirMessage. So long as "Prevent computer from sleeping automatically when the display is off" is checked, AirMessage should still work even if your Mac's screen is turned off.
It's also worth keeping in mind that I'm doing this with an iMac. If you have a MacBook, your settings might look slightly different.
What router are you using?
Now that the easy stuff is out of the way, it's time to have some fun with port forwarding and static IP addresses. Hooray!
I set up AirMessage using an OnHub router with the Google Wifi app, and my experience varied quite a lot compared to the instructions that are provided on the AirMessage website. As such, I've broken up the next few sections into two main groups — one set of instructions if you're using an OnHub router or Google Wifi, and another set that should work universally with anything else.
Buy used, save big
jemjem makes it safe and easy to save money buying gently used technology for home and family.

|
 |
 |
 |